Up Your "Gram Game With These MTB Photo Tips
A pro photog’s top pointers for capturing better mountain biking shots and (maybe) racking up a few more double-taps on Instagram.
I’ve been shooting action sports—from powder skiing to fly fishing—for over 10 years, and mountain biking is by far the hardest for me to capture well. Sure, anyone can get a decent picture of a rider in a beautiful landscape because, well, the landscape is beautiful—but those shots get old after scrolling through a few dozen Instagram posts.
So what is it about mountain biking that makes it so hard to capture? Simply put, it’s really tough to convey action. Modern cameras (including your iPhone) shoot so quickly that even the best riders can look like they’re standing still in photos. Compare that to powder skiing, for instance, where clouds of snow distinctly communicate the speeds involved, and it’s easy to see that you’re working at a disadvantage when shooting photos of your fat-tire friends.
It takes a certain set of elements to make an interesting mountain bike shot. Here are my top tips to help you step up your game.
Consider Your Gear
You don’t need an advanced dSLR camera to take great mountain bike shots, though it certainly helps. You just need to get creative and think about your composition before you shoot. Look at the trail before you and create the image in your head. Once you have that image, think about the gear (or phone) you’re using: Do you need to shoot wide-angle, should you zoom in, do you need to focus on a certain spot as the rider comes through?
If your gear has limitations, be sure to consider those as you’re shooting. But, realistically, our sport is so aesthetically pleasing that even iPhones can take some pretty spectacular shots. It’s all about capturing the moment, so I always say: “The best camera is the one you have with you!” Experimentation is key.
Be a Director
Don’t be afraid give your rider clear direction when setting up a shot. I always get weird looks when I tell my customers to strike the “enduro pose” (body low, elbows out) when they fly by me—but, hey, it works. The basic rule is that it doesn’t really matter if you’re going fast, just make sure you look like you’re going fast!
Since you’re lining up the shot, and can therefore picture the scene much more clearly, tell your buddy exactly how you’d like them to ride through the terrain you’ve picked for the picture. Consider how she’s leaning, where she’ll hit a jump or where the background is just right. As always, clear communication is key.

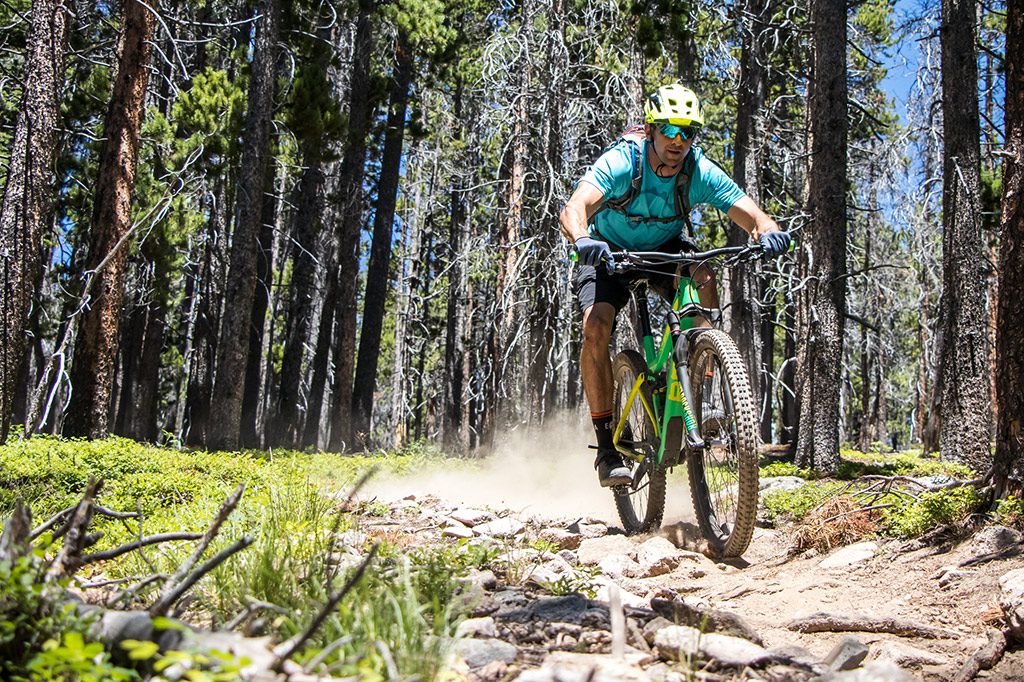
Convey Action
Like I mentioned above, it’s very difficult to capture the true action with mountain biking photography when you’re forced to shoot at such fast shutter speeds. If shooting with a dSLR, ideally, a shutter speed of 1/500s or faster will help ensure you capture a crisply focused image—and that will stop action dead in its tracks if not properly set up.
When shooting action, make sure you look for an element in the image that shows the rider is moving quickly: things like wind, body action or dirt in the air always help.
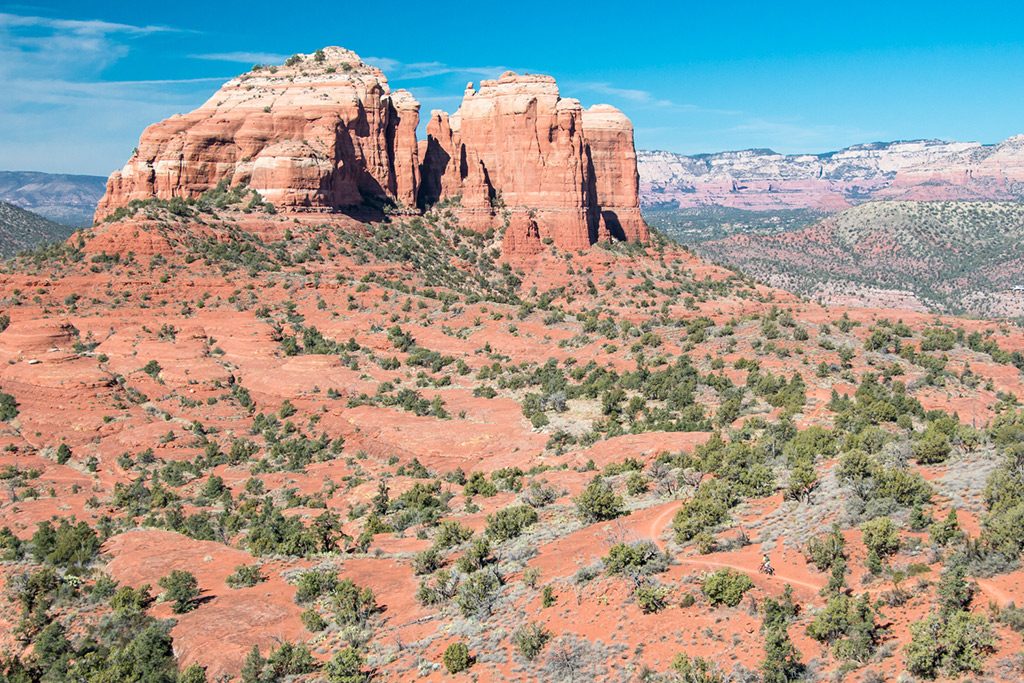
Show the Landscape
Sometimes, it really is just about the landscape we’re riding through; the rider becomes an element of the image to convey a sense of grandeur and scale. This is typically the easiest way to shoot mountain biking photography, but remember it’s important to mix things up and keep these to a minimum.
Be sure to place the rider strategically in the image, as to give proper scale to the landscape he’s riding in or through. Look at the scene in front of you and pick a section where the rider will stand out: a stretch of singletrack, an open meadow or even a blank canvas of sky. The viewer’s eye will be drawn to that area immediately if you frame it right.
Change Perspectives
One of my main rules of photography—especially when shooting for clients—is to always strive for a mix of perspectives, a tactic that helps keep things interesting and keeps the viewer on their toes. The easiest way to visualize images while riding is to picture them as you climb because you’re essentially looking at the scene you’ll want to shoot, just without the rider. Oh, and you’ll be moving slowly enough to take everything in. Obviously, this isn’t always possible (loop rides, for instance) but you can always ask your rider to double-back for a particularly interesting section of trail you spotted while grinding uphill.
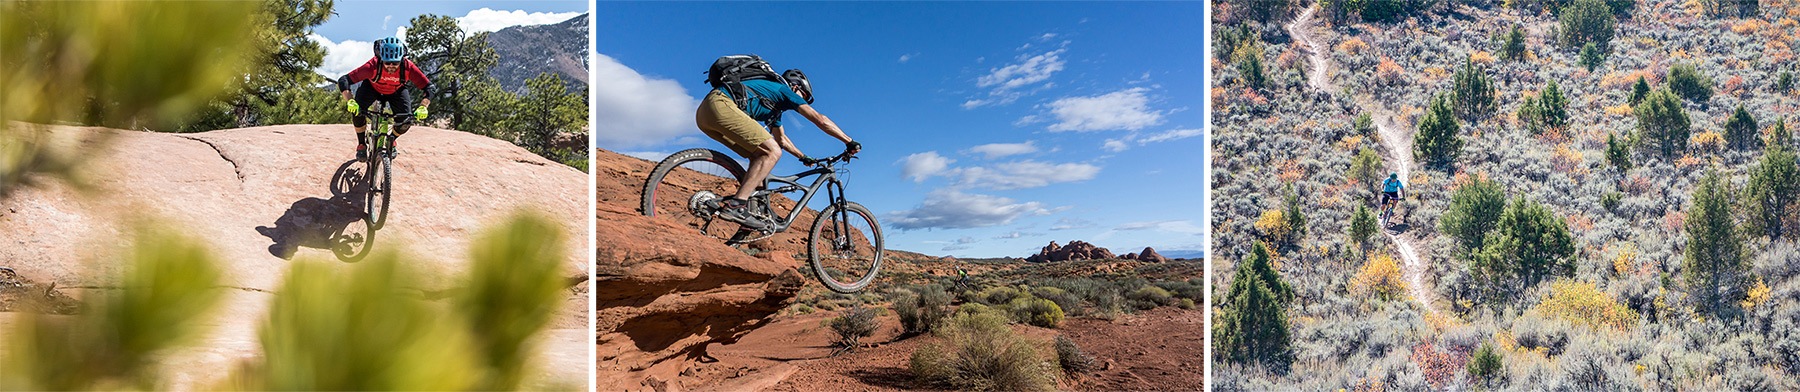
Finally, try to use different objects in the foreground for interesting bokeh (out-of-focus items that help frame the shot), and zoom in to show the rider’s emotion. Pain and elation are pretty common on most rides—capturing a rider immersed in one of these emotions will add to the character of a photo.
All photos by Steve Mokan


Comments
Post a Comment